
An Effortless Tex-Mex Feast: Easy Brunch Recipes for Friends & Family
- KCS team

- Feb 7, 2024
- 13 min read
Updated: Oct 15, 2024
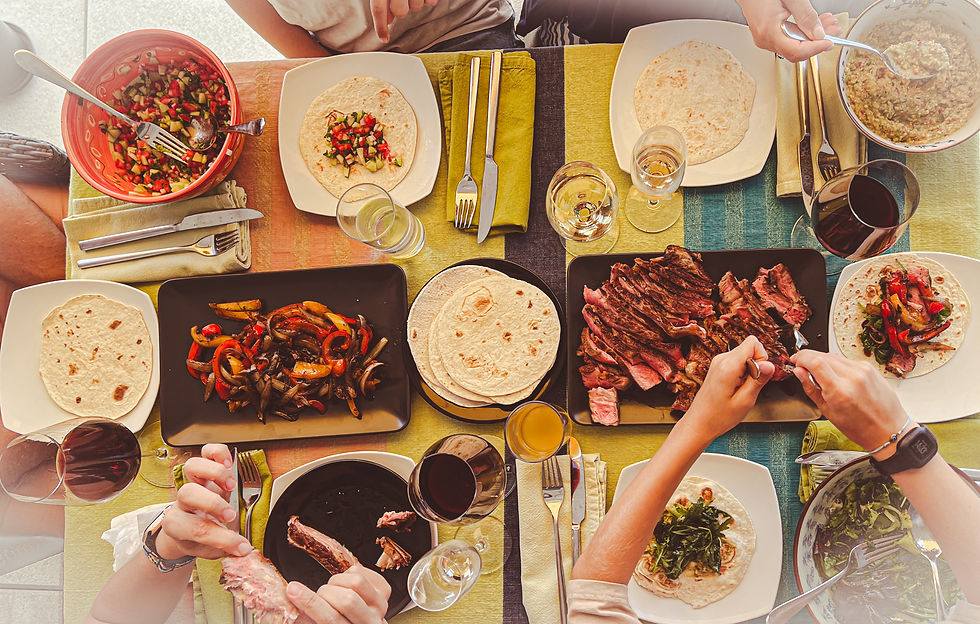
We're excited you're keen on bringing our Tex-Mex brunch vibes into your kitchen! Although the recipe is pretty simple, cooking a three-course meal with all the sides can be intimidating, especially for a brunch. In this blog post, we'll dive into the art of an effortless Tex-Mex feast, breaking it down into easy-to-follow steps and offering some handy tips to make it even easier. Whether you're a kitchen novice or need a quick refresher, we've got your back!
This is a part of our Experience #2 - The Tex-Mex Fiesta, check it out for all the recipes of the complete three course meal and wine pairings as well as the DJ Mix we used for the festivities.
Contents
Introduction
Tex-Mex food often gets a bad rap in Europe because it's frequently mistaken for authentic Mexican cuisine in restaurants. Those familiar with true Mexican flavours get irked, and even newcomers aren't impressed by the low-quality ingredients sometimes used. Even in its home state of Texas, you'll find Tex-Mex joints slathering dishes with too much cheese or drowning them in canned tomato sauce. But not all Tex-Mex is like this.
It's really hard to find a good Tex-Mex recipe book or any book about the details or history of this cuisine. That is until Josef Centeno, the chef patron of Bar Amá, published his Tex-Mex recipe book, Amá: A Modern Tex-Mex Kitchen, in which he shares recipes cooked by his grandparents who immigrated from Guanajuato to San Antonio. In his book, he says:
"Tex-Mex was largely dismissed by the culinary elite in the 1970s as inauthentic Mexican food. But that's the point. The only thing authentic about Tex-Mex is that it isn't authentic: It evolves and adapts."
He has a point. Why not adapt the recipes to the ingredients available to you and make them yours? Of course, these recipes we have cooked are not from his book; we've been cooking our own versions of Tex-Mex food for years now. These recipes can be easily prepared as a weeknight dinner or put together a couple of dishes, and you can cater to a whole party without breaking a sweat.
If you live in a European country, it's not easy to get hold of all the ingredients you need for Mexican recipes. And let's not even get started on how challenging authentic Mexican recipes can be. So, why not embrace Tex-Mex food like the great Josef Centeno has done and make your own version of it while retaining the authenticity of this cuisine that was brought over the border to Texas by Mexicans?
If you're a fan of Tex-Mex food, we highly recommend checking out "Amá: A Modern Tex-Mex Kitchen." This book offers hundreds of mouth-watering recipes that can be easily made at home, even if your cooking skills are very basic. (This is not a promotion, and we don't get paid for it. Some information is worth spreading for free.)
Nachos

When it comes to food brought over by Mexicans to Texas, nachos have to be the epitome. As long as you don't dump a kilo of cheap cheese on it and load it with every single ingredient you can get your hands on, stick to the simple recipe invented by Ignacio Anaya García. You guessed it right: Nachos are named after Ignacio.
Tortilla Chips: In the past, we have made tortillas from scratch, cut them into triangles, and fried them for nachos. But it's a laborious process, and the end results are quite greasy. So now we stick to standard shop-bought corn tortilla chips—specifically, Old El Paso "tortilla nachips". They are quite tasty and save a lot of time.
Chicken or Beef: Ignacio's original version didn't use any meat. If you want your starter or snack to be original and less filling, stick to a plain version with just chips, sauce, cheese, and jalapeños. We used leftover roast chicken for our recipe. You could also quickly fry some ground beef with a bit of cumin, coriander, and smoked paprika.
Sauce: Once again, here, sticking to simplicity is important; it's perfectly okay to use a shop-bought salsa, and recipes often call for it. We used Old El Peso "salsa for topping" and slightly changed the flavour by reheating it and adding some smoked paprika.
Other toppings: Jalapeños, green or red onions, radish, etc., can all be used as extra toppings. Centeno even uses pomegranate seeds, and it sounds like a really good idea.
Cheese: Obviously, in Texas or most American Tex-Mex restaurants, they use Monterey Jack, but if you are in Europe, this could be tricky to find. Centeno, in his book, suggests using cojita, an aged Mexican cheese that has a similar taste to Parmesan. We've never tried this, but it could work. We used smoked cheddar cheese. Often, our friends who don't know cheddar are surprised by how good it tastes on the nachos (and off it).
Ultimately, the toppings depend on whether you serve nachos as a main or a snack. For our starter, we kept it fairly light but flavourful enough to complement a cold beer.
Check out our Easy Nachos recipe.
Meat and Marinades
There are many recipes claiming to be the best or most authentic beef fajitas ever. However, the best beef fajita for someone is often a recipe they've tailored to their own tastes and preferences. We’re not here to tell you our recipe is the best, but we’ll give you the process behind it so you can make it your own.
Meat: It’s quite simple: use skirt steak (sometimes called "hanger" or "onglet" steak) for fajitas. This cheap yet flavourful cut of meat is the original fajita favourite. You can also opt for flank steak, which works equally well. All these types of steak benefit from a longer marination and quick cooking. But, depending on where you live or shop, it’s not always available.
So, what other cuts can you use? There are no strict rules—you can use any steak you prefer. The main thing to keep in mind is that leaner cuts tend to dry out faster during cooking. Prime cuts like filet mignon, on the other hand, don’t need marinades at all. In fact, marinating such delicate cuts could break down the texture and cause the flavour to disappear.
Now, let’s talk about marinades.

Marinades: A great marinade is essential for a good fajita. Not just for fajitas, though—marinades can elevate the flavour, texture, and moisture of any meat. Below is the recipe we use, but feel free to make it your own by experimenting with the ingredients. The beauty of cooking is finding combinations that suit your palate.
Our Fajita Marinade Recipe
50 ml tequila (good quality)
50 ml lime juice
100 ml beer (a darker beer)
15 ml olive oil
2 large cloves of garlic (minced)
1 tbsp minced coriander stalks
1/2 tsp cumin powder
1 tsp coriander powder
Why these ingredients? Let’s break it down.
The Role of Acids, Fats, and Flavourings
Every good marinade consists of three key elements: acid, fat, and flavourings. Here’s what each one does and why we chose the ingredients we did.
Acids:In our recipe, we use tequila and lime as the main acids. These aren’t just for tenderising the meat. Tequila, for example, adds a deep, earthy flavour that enhances the beef’s richness. Lime juice, on the other hand, adds a zesty brightness, cutting through the heaviness of the meat and balancing the flavours.
Acids in marinades help break down the tough fibres in the meat, which is great for cuts like skirt and flank steak. This makes the steak more tender and helps it absorb the other flavours in the marinade.
Fats: We use olive oil in our marinade because fats help carry and enhance flavours. The oil coats the meat, ensuring the marinade spreads evenly and that the steak retains moisture during cooking. You can experiment with different oils or even try using yoghurt or buttermilk for a slightly tangier result.
Flavourings: Garlic, cumin, coriander, and the coriander stalks add layers of complexity to the marinade. Garlic provides a punchy base, while cumin and coriander bring warmth and an earthy, almost nutty flavour. The fresh coriander stalks add a slight citrus note that complements the lime juice.
You can customise this to your liking by adding chilli flakes for a bit of heat or some brown sugar to balance the acidity. Once you understand these key elements—acid, fat, and flavour—you’ll be able to craft your own marinades effortlessly.
Vegetables and Guacamole
No Tex-Mex feast is complete without a fresh, tangy guacamole and some flavourful vegetables to balance out the richness of the meat. The beauty of Tex-Mex lies in its simplicity and flexibility, and both vegetables and guacamole are perfect examples of this.
Vegetables: Keep It Colourful and Crisp
When it comes to fajitas or any Tex-Mex spread, the vegetables you use are just as important as the meat. A mix of bell peppers and onions is classic, but don’t be afraid to throw in a few surprises.

Bell Peppers & Onions: Stick to the traditional red, yellow, and green bell peppers to add sweetness and colour. Slice them into strips, and for the onions, cut them into thin wedges. This allows the onions to soak up more flavour and makes sure they hold their shape while cooking. Use the same pan you cooked your meat in so that the vegetables absorb all the smoky, rich flavours.
Cook the onions and peppers on medium heat until softened, and then crank up the heat towards the end. Add a splash of oil to get some beautiful charring on the vegetables. This will intensify their flavours and give you that slightly crisp, smoky edge that complements the rest of the meal.
Optional Additions:If you want to go beyond the classic bell peppers and onions, why not throw in some mushrooms, courgettes, or even some sweet corn kernels? These extras bring more depth and texture to your dish, making it even more vibrant and flavourful.
BBQ Method:If you prefer a barbecue, you can easily grill your vegetables there. Toss your pepper strips and onion wedges in olive oil, salt, and pepper, and place them directly on the grill over medium-high heat. Turn them occasionally until you get nice char marks and the vegetables have softened. Keep an eye on the heat—it’s all about getting that char without overcooking.
Guacamole
Guacamole is the unsung hero of any Tex-Mex meal, offering that perfect creamy, tangy hit with every bite. But did you know there are endless ways to make guacamole, depending on your personal preference? We’re big fans of customisation, so here’s a quick guide to getting it just right.

The Basics: At its core, guacamole is made from ripe avocados, lime juice, salt, and coriander. Simple, right? But from there, the world is your oyster. Some people like it smooth, others chunky. Personally, we prefer a bit of texture, where you can still taste the avocado’s creaminess alongside the zesty lime and fragrant coriander.
Here’s our go-to guacamole recipe:
2 ripe avocados (mashed)
1 red chilli (finely chopped, seeds removed for a milder flavour)
1/2 a tomato (deseeded and finely diced)
1/2 a bunch of coriander (chopped)
Juice of 1-2 limes (depending on how tangy you like it)
Salt and pepper to taste
Optional Add-ins:For those looking to mix things up, you can add a touch of garlic, a pinch of cumin, or even a few pomegranate seeds for a sweet contrast (yes, like Josef Centeno’s touch in his nachos!). Some people like to add sour cream or yoghurt for extra creaminess, but we like to keep it classic.
Tip: Always taste your guacamole before serving. The balance of lime, salt, and avocado is key, and it’s easy to adjust if needed. Just don’t overdo the lime juice—it’s easier to add more than to take it away!
Fried Ice Cream: A Sweet and Crunchy Finish
We couldn’t wrap up our Tex-Mex Fiesta without a dessert that’s as fun to eat as it is to make. Fried ice cream might sound like something you’d only find in a restaurant, but it’s surprisingly easy to prepare at home, and it’s guaranteed to impress your guests.
This dessert brings together two of our favourite things: creamy, cool ice cream and a satisfyingly crunchy coating. Add a bit of tropical flair with grilled pineapple, and you’ve got a dish that delivers on both flavour and texture without the hassle of a complicated recipe.
Why Fried Ice Cream?
Fried ice cream may feel like a Tex-Mex classic, but its origins are actually up for debate. Some believe it first appeared in the U.S. during the late 1800s, while others credit its popularity to the 1970s, when the now-closed Chi-Chi’s restaurant chain introduced it to their menu. Despite not being a traditional Mexican dessert, fried ice cream became a staple in many Mexican-American and Tex-Mex restaurants due to its unique combination of a crispy, warm coating and cold ice cream inside. It’s a dessert that’s as indulgent as it is fun, and it’s stuck around for good reason.
The Perfect Ice Cream: Store-Bought or Homemade
For this recipe, store-bought coconut or vanilla ice cream works perfectly. Coconut adds a subtle tropical note, while vanilla keeps things classic. But if you want to take your dessert to the next level, why not make your own vanilla ice cream? It’s easier than you think, and it gives you full control over the flavour and texture.
Homemade Vanilla Ice Cream Recipe
500ml whole milk
250ml double cream
6 large egg yolks
150g caster sugar
1 vanilla pod (or 1 tsp vanilla extract)
Method
Heat the Milk & Cream: Pour the milk and cream into a saucepan. Split the vanilla pod, scrape out the seeds, and add both the seeds and pod to the pan (or add vanilla extract if using). Heat gently over medium heat until it’s almost boiling, then remove from the heat and let it infuse for 15 minutes.
Whisk the Eggs & Sugar: While the milk mixture is infusing, whisk the egg yolks and sugar together in a bowl until pale and slightly thickened.
Temper the Eggs: Slowly pour the warm milk mixture into the egg yolks, whisking constantly to avoid curdling. Once combined, return the mixture to the saucepan.
Cook the Custard: Heat gently, stirring constantly, until the mixture thickens slightly and coats the back of a spoon. Be careful not to let it boil, or the eggs will scramble.
Cool & Churn: Once thickened, strain the mixture through a fine sieve into a bowl to remove the vanilla pod and any lumps. Let it cool completely, then churn in an ice cream maker according to the manufacturer’s instructions. If you don’t have an ice cream maker, pour the mixture into a container and freeze, stirring every 30 minutes to break up ice crystals, until smooth and creamy.
Once the ice cream is ready, it’s perfect for your fried ice cream recipe. You can make this a day in advance to save time on the day of your Tex-Mex feast.
The Crunchy Coating
Instead of deep-frying, we opted for a lighter approach by toasting panko breadcrumbs in a dry pan until golden and crispy. This gives the ice cream a satisfying crunch without the mess or heaviness of frying in oil. Plus, toasting the panko ensures you keep the flavours fresh and clean.
Tip: Make sure the panko is golden brown before you roll your ice cream in it—it’s the crispness of the breadcrumbs that makes this dessert stand out.
Grilled Pineapple: The Tropical Twist
The grilled pineapple is the unsung hero of this dessert. Its sweet, smoky flavour adds a refreshing contrast to the richness of the ice cream. Simply grill pineapple batons on a hot griddle pan until you get those beautiful charred lines and the natural sugars start to caramelise. The smoky-sweet flavour of the pineapple takes this dessert to another level.
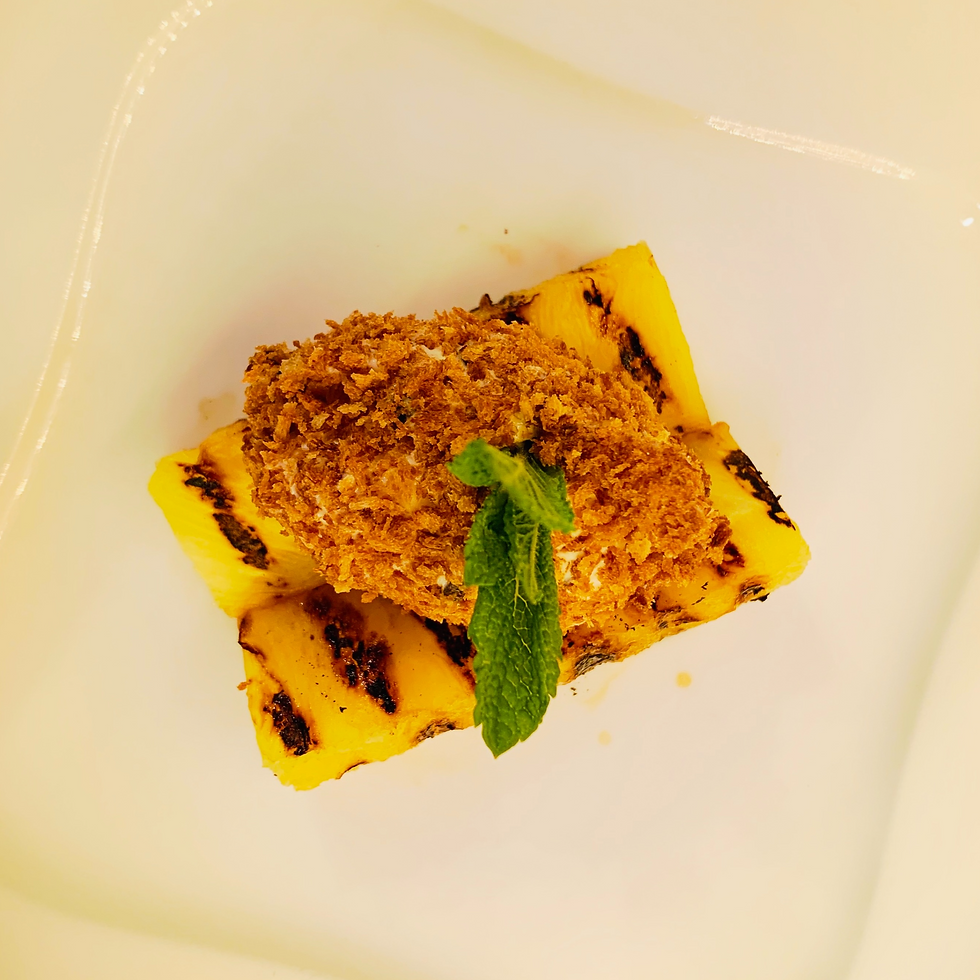
Assembly
To serve, simply roll your ice cream scoops in the toasted panko breadcrumbs and plate them on top of the grilled pineapple batons. The combination of crunchy, creamy, and smoky is one that your guests won’t forget.
And the best part? You can prepare the elements in advance, so when it’s time to serve, all you have to do is assemble the dish and enjoy. It’s a dessert that’s easy to pull together but delivers on texture and flavour—perfect for your Tex-Mex feast.
Time Management: How We Made It Look Effortless
Hosting a three-course Tex-Mex brunch sounds ambitious, but with a bit of planning, it’s easier than it looks. We had our guests over, and by keeping things simple and organised, we managed to pull it off without any stress. The best part? The kids loved getting involved, assembling nachos and helping us cook while we kicked off the brunch with a few drinks.
Here’s how we did it.
The Day Before
We kept things light in terms of prep. You don’t need to spend all day in the kitchen, but there are a few things you can do ahead of time to save yourself from rushing on the day:
Ice Cream Prep:If you’re going homemade with the vanilla ice cream, you can make it the day before. Once churned and frozen, that’s dessert sorted. We also toasted the panko breadcrumbs in advance and grilled the pineapple, which gave us one less thing to worry about.
Marinating the Meat:When it comes to marinating the steak, less is more. For tender cuts like the one we used, a couple of hours is perfect. However, if you’re working with a tougher cut of meat, marinating overnight is a good option to help break down the fibres and tenderise it. Just be mindful not to marinate delicate cuts for too long, as it can affect the texture.
Chop the Veggies:While the guacamole should be fresh, you can chop the tomatoes, onions, and chillies the day before and store them in the fridge. This saved us time when it came to assembling the salsa and guacamole right before serving.
On the Day
Here’s how we ran the show on the day of the brunch, which started at around 11 a.m. with drinks and nachos:
Get the Kids Involved:The kids loved being part of the process. They assembled the nachos with us—layering tortilla chips, cheese, salsa, and jalapeños. We had the oven preheated, so it only took a few minutes to melt the cheese, and the nachos were ready to go just as we were starting the first drinks.
Cooking the Meat:While we enjoyed the nachos, we started grilling the marinated steak. Once cooked to perfection, we let it rest for about 10 minutes. Meanwhile, we used the same pan to grill the peppers and onions. A tip: cut the onions into thin wedges, and crank up the heat toward the end to get a nice char. It adds that smoky depth of flavour.
BBQ Option:If you’re using a BBQ, throw the veggies on there as well. Toss them in some olive oil and let the grill work its magic.
Guacamole, Fresh and Fast:The guacamole came together in no time. While the meat was resting, we mashed the avocados, threw in the chopped ingredients, and adjusted the seasoning. It’s always best to make it right before serving to keep it fresh and vibrant.
Dessert Last but Easy:By the time we were done with the main course, the kids were more than ready for dessert. Since we’d prepped the components the day before, all we had to do was roll the ice cream in the toasted panko breadcrumbs and plate it with the grilled pineapple. It was the perfect, easy finale to our Tex-Mex feast.
Our Key Takeaways
Keep Things Flexible:The idea is to have fun, so if the timings shift a little, that’s completely fine. A laid-back vibe is what Tex-Mex brunches are all about.
Get Everyone Involved:It’s not just about the food—it’s the experience of cooking and eating together. Having the kids help with the nachos and prep made the day more enjoyable for everyone.
Comments